
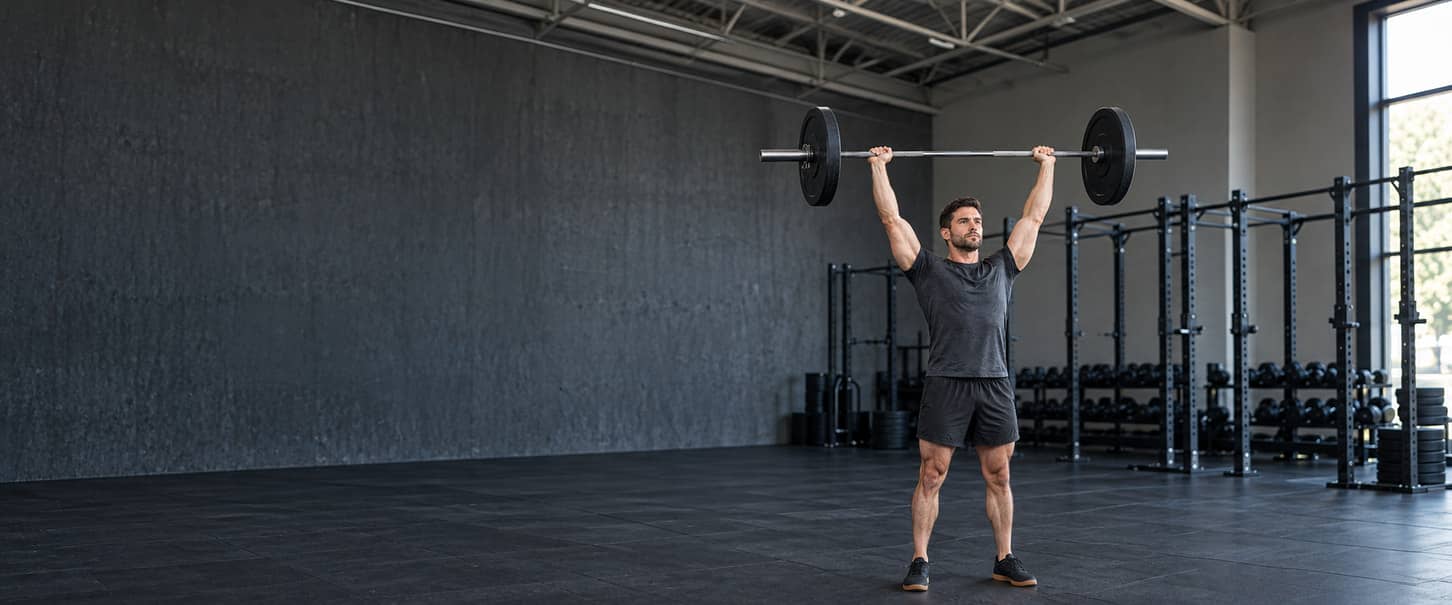
Overhead Press: Learn the Strict Barbell Lift
A strict overhead press takes a barbell from the front of your shoulders to a controlled overhead position without a knee dip or leg drive. Keep the bar close enough to avoid a large forward arc, move your head just enough to clear it, and return the bar under control before racking it. This guide teaches the standing, front-of-body barbell press from a rack. It covers the setup, the full movement, checks for common problems and an example from an existing strength plan. A push press deliberately uses the legs and is a different exercise. Start with a bar you can handle through the whole sequence, including taking it out and putting it back. A heavier bar is not progress if you need more backward lean, a shorter movement or help from your legs. Seated dumbbell and machine presses remain useful alternatives when the standing barbell setup does not fit your needs.
Set Up the Rack, Bar and Pressing Space
Use a stable rack, compatible hooks and safety supports, a suitable bar, matching plates and secure collars. You need room for the bar ends and plates throughout the lift, not just space above your head. Check ceiling beams, lights and the rack crossbar before loading.
| Check | What you need | Change the setup when |
|---|---|---|
| Hook height | Both hooks level, with the bar reachable around upper-chest height | You must rise onto your toes or shrug the bar out. |
| Bar and plates | A bar you can press and return, with plates and collars that fit | The empty bar is already too heavy or the equipment is incompatible. |
| Overhead clearance | Space for the highest part of the loaded bar and your full pressing movement | A plate or bar can strike the rack, ceiling or another object. |
| Safety supports | Compatible supports arranged for the actual pressing area and intended range | They obstruct normal movement or remain behind you after you step away. |
| Standing area | Firm, nonslip footing with clear space around both bar ends | You must work around bags, loose plates or nearby people. |
| Return to the rack | A short, clear route back with both hooks visible and reachable | You cannot place the bar securely without stretching, twisting or guessing. |
Ask qualified gym staff to check unfamiliar rack supports and the working position with a light bar. Supports are not a guarantee that any falling bar will be caught, and they do not make deliberate failure practice appropriate. Use equipment that permits both the press and a controlled return; do not improvise supports from furniture. Rehearse taking the light bar out, establishing your stance and putting it back before adding working weight. Hook height should let you lift it clear by standing up from a slight knee bend. Once in the pressing stance, that knee bend is no longer used to propel repetitions.
How to Do the Standing Barbell Overhead Press
Standing Barbell Overhead Press
Use a light enough bar to practise the press and its return without strain. Set the rack as described above and establish where you will stand and how you will rerack before starting.
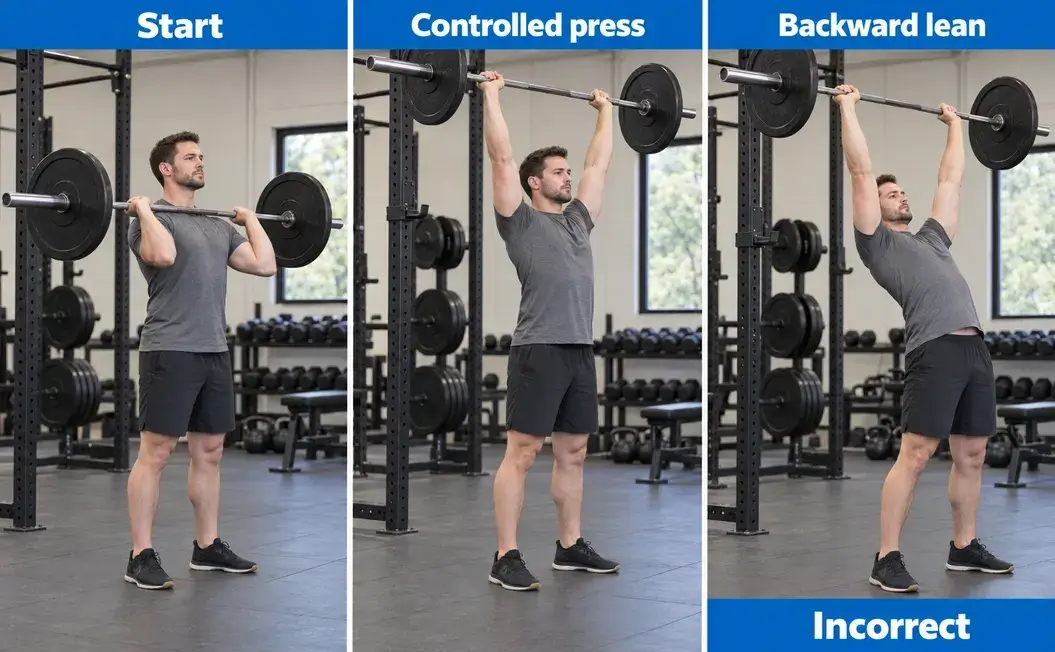
- With the bar supported, take an even, full overhand grip just outside the shoulders as a starting point. Wrap your thumbs around the bar and place it low in the palms rather than balancing it on the fingers.
- Step beneath the bar, bring it to the front-shoulder or upper-chest starting position and brace your trunk. Stand to lift it clear of both hooks, then take only the small steps needed to enter the checked pressing area.
- Settle into a comfortable stance around hip width, with your whole feet planted. Keep the knees and hips steady. If the grip needs changing, return the bar to the rack before adjusting it.
- Prepare your breath and brace before the bar leaves the start. Move your chin back just enough to clear the bar, then press upwards without a knee dip, hip thrust or increasing backward lean.
- As the bar clears your head, bring your head back towards its normal position beneath it. Guide the bar into balance above your body rather than leaving it far in front or forcing it behind you.
- Finish with controlled elbow extension, stable footing and the bar over roughly the middle of your feet. Allow the shoulder blades to move with your arms; do not keep them pinned down throughout the lift.
- Lower the bar steadily to the same front-of-body start, moving the head out of its path again. Re-establish your breath and brace as needed before the next repetition. Stop before you lose the ability to lower and return the bar under control.
- After the final controlled return to the starting position, walk the short route back to the rack. Bring both sides of the bar to their hooks, lower it into support and confirm that both sides are secure before releasing your hands.
One repetition includes the press and controlled return. Taking the bar out of the rack and putting it back are separate handling steps, not extra repetitions. Do not walk towards the rack with the bar overhead. If the lightest available bar cannot be handled through this sequence, use a lighter training bar or choose a suitable different press. Do not learn a floor clean, use a leg drive or shorten every repetition simply to get a bar into this exercise.
Grip Width, Wrist Position and Elbow Setup
Find a grip you can support
Start with your hands just outside shoulder width, then check how the bar sits over your forearms. From the front, the forearms should be close to upright rather than strongly angled in or out. Small adjustments can improve the fit; there is no hand spacing in centimetres that suits everyone. Keep both hands equally spaced from the centre of the bar. Use the markings to reproduce the grip, not as proof that a particular ring must sit under a particular finger. Make adjustments with the bar supported.
Support the bar in the palm
A small amount of wrist extension may be needed. The aim is to keep the load supported near the heel of the palm, not to force a perfectly straight wrist or let the bar roll towards the fingertips. Maintain a full grip with your thumbs wrapped around it. If wrist discomfort remains with a manageable load and sensible adjustments, stop testing heavier sets. Wrist wraps do not correct an unsuitable grip or diagnose why the position hurts.
Keep the elbows ready to press
At the start, the elbows will commonly sit slightly in front of the bar when viewed from the side. Keep the forearms able to support the load rather than forcing the elbows high into a front-squat position or far behind the bar. Use a repeatable starting height around the upper chest or front shoulders. Do not force contact with the collarbones by losing your grip or changing the trunk position. If a much higher start is the only controllable option, recognise that it changes the range; obtain setup help or choose a different press instead of presenting it as the same full movement.
Bar Path, Shoulder-Blade Movement and Breathing
Clear the face without making a large arc
The bar starts in front of your head and finishes above your body, so your head must move out of its way. Move it back only enough for clearance, then return it beneath the bar once the bar has passed. Do not crane your neck forwards or push the bar in a wide curve around your face. Think of a close, direct route, not a geometrically perfect vertical line that requires the bar to touch your nose. Check the reverse route as you lower. A small repeatable change in torso angle for clearance is different from leaning progressively farther back as the set gets harder.
Let the shoulder blades move
The shoulder blades rotate upwards as the arms rise. Keep supporting the weight at the top rather than trying to hold the shoulders permanently down and back. Controlled elbow extension and coordinated shoulder movement are part of the finish. Do not chase extra height by forcing a shrug or snapping the elbows. Judge the overhead position together with your feet, trunk and bar. Do not force the bar behind the head to imitate a photograph when that makes you lose balance or arch farther.
Brace without rushing your breathing
Before each press, prepare a breath and firm the trunk so your lower-back arch does not grow as the bar rises. Breathe and rebrace between repetitions as needed while the bar remains controlled. Do not rush the next press simply to maintain a count, or turn the whole set into one prolonged breath hold. People with medical advice about straining or breath-holding should follow that advice. Dizziness or unusual breathlessness is a reason to stop, not a cue to brace harder. Breathing practice does not require a maximum lift.
Overhead Press Muscles Worked and Training Benefits
The deltoids and triceps produce much of the pressing action. The upper chest can assist, while muscles around the shoulder blades help control arm movement and the overhead position. The trunk and lower body hold your standing position even though the legs do not drive the bar upwards. That combination makes the lift useful for developing and practising standing overhead strength. It does not make it a complete leg exercise, an isolated side-delt exercise or a replacement for every shoulder movement. Existing bench and incline presses also contribute shoulder and triceps work. Choose the barbell press when that particular movement serves your goal and you can set it up well. Dumbbells and machines change the support, hand paths and loading demands; they are not inferior simply because their numbers differ. Short-term measurements of muscle activity cannot establish which version will produce the most growth for everyone. Use the shoulder exercise guide to choose complementary presses and raises rather than adding every option to the same session. The useful question is what your current workout needs, not how many exercises can be labelled as shoulder work.
Common Overhead Press Mistakes and What to Check
Look for a specific change rather than judging the whole lift as simply good or bad. Compare a manageable rehearsal with the working set. An issue present before loading may need a setup change; an issue that appears only as the set becomes difficult may require less weight, fewer repetitions or more recovery.
| What you notice | Check first | Next action |
|---|---|---|
| You rise onto your toes to take the bar out | Hook height and position under the bar | Lower the hooks and rehearse the unrack before loading. |
| Wrists fold back and the bar rolls towards the fingers | Bar placement in the palm, grip width and load | Refit the grip with the bar supported; use less weight if the position changes under load. |
| The bar travels in a wide arc around your face | Head clearance and elbow position at the start | Rehearse a closer route with a lighter bar; move the head, not the bar far forwards. |
| The lower-back arch grows with each repetition | Load, breathing and trunk position | End the set and reduce the demand; do not chase the finish with more lean. |
| A knee dip starts the press | Whether leg drive is being used to finish a strict set | End the strict set. Use a manageable load rather than turning missed reps into push presses. |
| The bar remains well in front at the top | The whole overhead position with a light bar | Recheck the bar path and balanced overhead position; seek help if a controllable position remains unavailable. |
| One side rises or returns unevenly | Plate loading, equal hand placement and control | Stop, check the equipment and use a lighter rehearsal; do not diagnose an imbalance from one rep. |
| You struggle to reach both hooks at the end | Working position, hook height and the route back | Change the setup and practise the return with a light bar before another working set. |
Use a short, repeatable technique check
- Choose one observation, such as a growing back arch, and note when it begins: before the first press or only on later repetitions.
- With manageable resistance, have a competent observer check the start, finish and return, or review a video where gym rules permit. Do not turn your head towards a mirror during the lift.
- Change one relevant feature, such as hook height or load, then repeat a brief controlled rehearsal. Keep other conditions similar enough to judge the change.
- Continue only when the movement is controllable. If the same problem persists with a light setup, get coaching or select another press rather than repeatedly adding weight.
A view from the side can help show bar travel and changes in trunk angle; a front view can help show hand spacing and uneven movement. Neither view diagnoses a shoulder condition. Do not place a camera or observer in the bar's path, and do not add hard sets solely to obtain footage.
Choose a Starting Weight and Warm Up Without Fatigue
Start with a bar you can take from the rack, press repeatedly and return without a struggle. An empty bar is not automatically a beginner weight: training bars and full-size bars can have different masses. Check the actual bar rather than assuming every bar weighs the same.
Rehearse before adding load
Begin with comfortable general movement, then practise the press with a light bar. Use a small number of additional, gradually heavier rehearsal sets when the planned working load requires them. Keep those sets easy enough that they do not become another workout before the work sets begin. Check face clearance, a steady trunk, the overhead finish and the return to the rack at each stage. Stop increasing the load if the next step changes those features. Do not perform a maximum test simply to choose a starting weight.
Use the effort target in your plan
The five-set example below comes from a plan that starts conservatively, with about three or four good repetitions still possible after the first working set. This is an estimate, not an instruction to test the extra repetitions. Later sets may feel harder as fatigue builds. The reps-in-reserve guide explains that estimate. Keep enough control to lower and rerack the bar; completing a target is not worth losing the exit. A reduced learning session should be recorded as the work you actually performed, not as a completed five-set session.
Count the whole bar load
Record the bar-plus-plate weight in one consistent unit. A 20 kg bar with 5 kg on each end totals 30 kg. Adding 0.5 kg to each end makes 31 kg, not 30.5 kg. These numbers illustrate the calculation; they are not suggested starting weights.
Sets, Reps and Progression: A 5x5 Workout Example
Use the sets, repetitions and schedule of the workout plan you are following. Learning the overhead press does not create an extra shoulder day. The example here uses Workout B of the 5x5 Workout Plan, where the press is the second exercise, after squats.
| Exercise | Sets & Reps | Rest | Tempo | Target Muscles | Notes |
|---|---|---|---|---|---|
| Standing Overhead Press | 5 sets of 5 reps | 3–5 minutes | 2-0-X-1 | Deltoids, Triceps, Upper Chest, Trunk | Brace before each rep, finish with the bar balanced over the mid-foot, and avoid using a repeated leg drive |
For the strict barbell version taught here, perform each press without leg drive. The tempo means two seconds lowering, no deliberately prolonged pause at the bottom, a press with fast but controlled intent, and a one-second overhead hold. X describes intent, not a guarantee that a challenging bar moves quickly. A zero does not mean bounce, and you may still take the time needed to breathe and regain control. Five sets of five make twenty-five planned repetitions in this exercise. Warm-ups are separate. Leave the other exercises and the complete plan's order unchanged.
Earn the next increase
The source plan permits a small increase after all prescribed repetitions are completed with consistent technique and suitable effort and recovery. It commonly uses total overhead-press increases of 0.5–1.25 kg or 1–2.5 lb, depending on the available equipment. Those are alternative practical ranges in their own units, not exact conversions or compulsory jumps. Use matching, securely fitted small plates when available. If the smallest usable increase is too large, retain the present load and review the progression rather than adding loose objects or changing to a push press. This is a fixed five-repetition prescription, not an instruction to increase every set to eight or ten.
Respond to missed repetitions
An isolated late miss usually calls for recording the result and repeating the load at the next press session, after checking rest and recovery. If comparable failures recur, the source plan calls for reviewing recovery and workload, then reducing and rebuilding when needed. Its repeated-failure reduction is approximately 7.5–10%, not an automatic response to one poor set. If you are following a different plan, retain that plan's progression rules. The 531 Workout Plan, for example, uses its own Training Max and percentage structure; this five-set example does not replace it.
Track Strict Repetitions and Judge Progress
The following log is hypothetical. It uses the 5x5 Workout B barbell press above, with four-minute rests between sets and the same rack setup, grip, range and 2-0-X-1 tempo. The weights are examples, not targets. Each row represents one press session, not a calendar week.
| Session | Bar-plus-plate load | Set 1 | Set 2 | Set 3 | Set 4 | Set 5 | Decision |
|---|---|---|---|---|---|---|---|
| 1 | 30 kg | 5 | 5 | 5 | 5 | 4 | Twenty-four strict reps; check rest and recovery, then repeat after this isolated late miss. |
| 2 | 30 kg | 5 | 5 | 5 | 5 | 5 | Twenty-five strict reps; if technique, effort and recovery also qualify, consider 31 kg. |
| 3 | 31 kg | 5 | 5 | 5 | 5 | 4 | Twenty-four strict reps; keep the same load for the next comparable session. |
| 4 | 31 kg | 5 | 5 | 5 | 5 | 5 | All prescribed reps completed; consider a further manageable increase only if the other criteria also qualify. |
| 5 | 32 kg | 5 | 5 | 5 | 5 | 3 | Twenty-three strict reps. Two further leg-assisted presses were performed, but do not complete the strict target. |
In the final row, record the two leg-assisted movements separately rather than hiding them or treating them as strict reps. The set should have ended when strict control was no longer available. More total movements do not make this a successful five-by-five strict-press session. Record the weight, repetitions in each set, rest and any meaningful change in the setup or movement. A brief note such as "last two used leg drive" is more useful than writing "completed". Name the variation when changing exercises so later comparisons use the same lift. For an unexpected drop in repetitions, use why reps drop between sets before assuming the press has reached a plateau. A new maximum, extra sets or a new exercise is not the automatic response to one difficult session.
Keep the weekly context
The source plan places Workout B once in the A/B/A week and twice in the following B/A/B week. That is five sets and ten sets respectively, or fifteen planned press sets across the two-week sequence, provided all three B sessions are completed. These are counts for the named press, not totals for every muscle involved. Bench pressing and other training still affect recovery. Do not add another five sets just because the first week contains fewer press sets, and do not label missed or reduced work as completed.
Standing, Seated and Push Press: Choose the Right Task
Change the exercise to solve a real problem: unavailable equipment, an unsuitable hand path, difficult load handling or standing balance that limits the work. A different press can be useful without reproducing every demand of the strict standing barbell version.
| Option | Useful distinction | What remains different |
|---|---|---|
| Seated dumbbell shoulder press | Back support and independent hand paths may fit better | Two weights still need controlled positioning and set-down; it is not the same barbell-strength task. |
| Machine shoulder press | Guided handles can simplify load handling when the station fits | The seat, starting position, path and displayed resistance are machine-specific. |
| Push press | Deliberate leg drive contributes to lifting the bar | It is a separate movement to learn, not a way to count unfinished strict repetitions. |
The supported shoulder-press tutorials explain the seated dumbbell and machine setups in full. Read the relevant entry before using it. Back support changes the task but does not remove the need for trunk control. The 5x5 source already allows a seated dumbbell or machine press when standing stability is the limiting factor. Check that choice against your goal and the complete plan, select a new manageable load and record the change. Do not convert a barbell number directly into dumbbell or machine resistance; why gym machine weights differ explains one reason the figures cannot be compared directly. Replace the remaining allocated work rather than adding a full new press session after work you have already completed. A low ceiling, missing rack or unsuitable bar is not a reason to improvise a kneeling barbell press, a floor clean or household supports. A different suitable setup is preferable to forcing this one. Use when to change your workout plan when the adjustment affects more than one exercise. A deliberate push press needs its own technique practice and place in the plan; it is not an automatic progression from a stalled strict press.
When to Stop, Reduce the Load or Get Help
Ordinary muscular effort is different from pain, sudden weakness or losing control of the bar. End a set when the intended range and return are no longer available. With a manageable setup, a smaller load or a corrected rack position may address a training problem; neither is a diagnosis. Stop a painful press rather than repeatedly testing wider grips, deeper starts or heavier weights. Persistent or worsening shoulder or arm symptoms need individual assessment. Seek urgent medical advice for sudden severe pain, inability to move the arm, marked swelling, a change in shape or loss of feeling, particularly after an injury. A technique video cannot establish why a shoulder hurts, and no grip width or shoulder-blade cue guarantees an injury-free lift. Do not use this guide as rehabilitation or override an existing medical restriction. When the movement is pain-free but an unfamiliar rack or return route remains uncertain, ask qualified facility staff or a competent coach to check it before a working set. That is a setup question worth resolving before adding weight.
Overhead Press FAQs
Is an overhead press the same as a shoulder press?
The terms are often used broadly. This guide teaches a strict standing barbell press in front of the head. A seated dumbbell press, machine press and leg-driven push press use different support or movement, so identify the version rather than relying on the name alone.
Is a military press different from a strict press?
Military press is another name used for a barbell overhead press. Follow the actual movement instructions rather than assuming the name defines one grip or stance. The version taught here uses a stable stance and no deliberate leg drive.
How wide should my grip be?
Start just outside shoulder width, then check wrist support and near-upright forearms from the front. Adjust with a light, supported bar. Do not force a particular marking or centimetre measurement if it makes the setup awkward.
Should the bar touch my chest?
Use a repeatable start around the upper chest or front shoulders. Do not force collarbone contact by opening the grip or changing your trunk position. A substantially higher start shortens the range and should not be recorded as an unchanged full press.
Should I lock my elbows at the top?
Finish with controlled elbow extension and the bar balanced over your base of support. Do not snap the elbows or push beyond a controllable position. Keep supporting the bar rather than relaxing beneath it.
Should I hold my shoulder blades down and back?
Not throughout an overhead press. Let them move with the rising arms while the trunk stays controlled. Do not replace that coordinated movement with a forced shrug or a growing lower-back arch.
What weight should a beginner use?
Use the lightest suitable bar that lets you practise the entire movement and rerack comfortably. Bar masses vary, and an empty full-size bar can be too heavy. Learn the setup before adopting a full working prescription or testing strength.
Why is my overhead press stalling?
First check whether the load increase is too large, the rest has shortened or technique changes on later reps. Review other pressing and recovery before adding work. Repeated comparable failures need a progression review; one poor session does not establish a plateau.
Can I use my legs for the last repetition?
Not if you are counting strict presses. Leg drive changes the movement into a push press. End the strict set when the next repetition requires it, and record any leg-assisted movement separately if it has already happened.
Are dumbbells or a machine better than a barbell?
They may fit your support, handling or arm-path needs better, but none is best for every goal. Use barbell practice for barbell-specific performance. Choose other presses deliberately and start with a load suited to the new exercise.
Can I overhead press without a rack?
The barbell version taught here starts and finishes in a rack. A floor clean is a separate skill, not an assumed setup step. Use a suitable supported press or obtain instruction for another arrangement rather than improvising furniture or lifting a heavy bar into place.
How often should I overhead press?
Follow the complete plan's schedule and account for its other pressing work. In the cited 5x5 sequence, the press appears once in the A/B/A week and twice in the B/A/B week. That is an example, not a rule that everyone needs that frequency.