
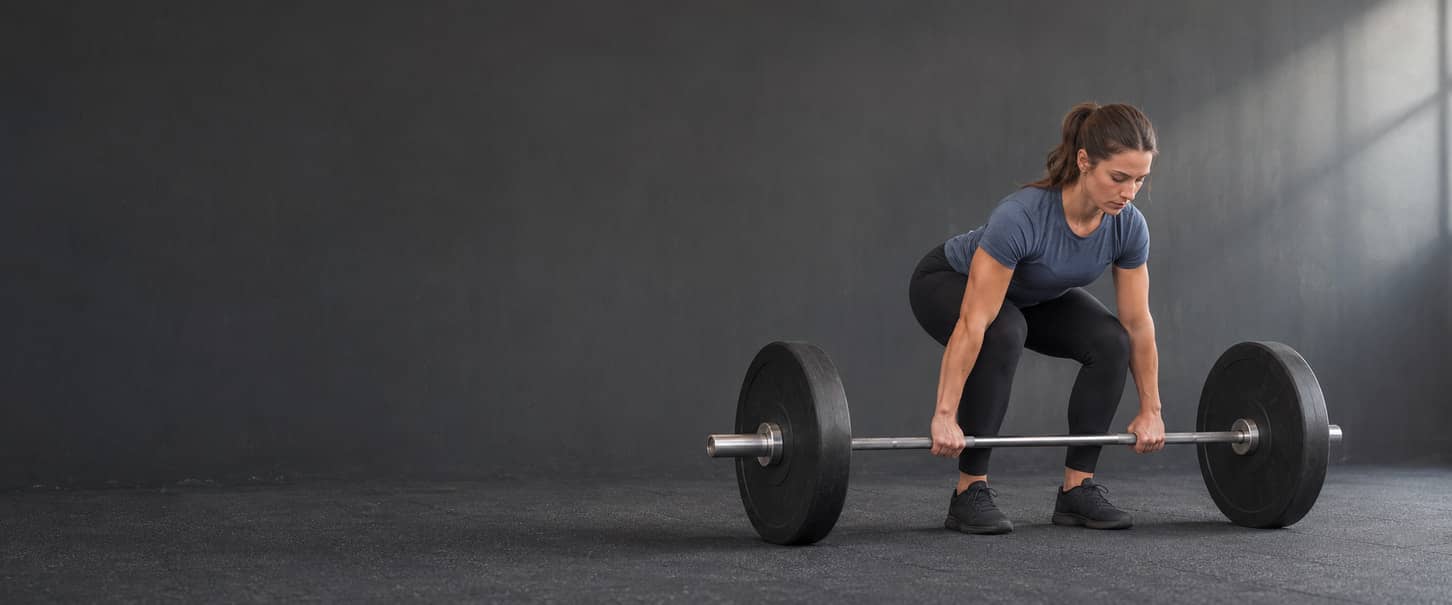
Conventional Deadlift: Learn a Floor Start and a Complete Reset
A conventional deadlift lifts a barbell from the floor to standing with the hands outside the legs. In the reset-style version taught here, return the bar under control and let both plate ends settle before setting up the next repetition. The first pull is already a working repetition when the working set begins; it is not a free pickup before the counted work. The hips and knees extend to lift the load. The glutes, hamstrings and quadriceps contribute, while the trunk, upper back and grip help control the bar. This is not perfect isolation of the back or legs. The movement differs from a Romanian deadlift, whose working repetitions start standing and reverse a controlled hinge without a compulsory floor touch. This guide teaches one double-overhand, floor-start implementation, then applies it to an existing Upper/Lower workout slot. It covers bar height, preparation, the return and reset, and the next-session decision. It is not a maximum test, a new deadlift programme or a guarantee that everyone should pull from the same height or use the same body angles.
Choose a Bar Height and Load You Can Actually Handle
Start with a level, secure lifting area and compatible equipment that is permitted for floor lifting. Check the bar, sleeves, plates and collars, and ask staff to show unfamiliar loading or handling procedures. Keep feet, fingers and other people clear of the plate edges and landing area. Do not try to catch a rolling bar or change a collar while holding the load up. Plate size and plate mass are separate features. A small-diameter plate puts the bar lower than a larger-diameter plate on the same floor. Suitable full-size light training plates can provide a usable floor-start height without forcing a heavy load. Check the actual equipment: not every light plate has that diameter or is intended for the same use. Choose the mass and start height separately; both need to be manageable.
| Check | What to establish | Stop or change the setup when |
|---|---|---|
| Bar and total mass | A bar you can control, with its actual mass known or clearly recorded as unknown | The empty bar already exceeds a manageable learning load. |
| Plates and starting height | Matching floor-contact diameters on both ends and an accessible, level start | Small plates force an unsuitable reach, or the two ends rest at different heights. |
| Retention and compatibility | Correctly fitted, permitted plates and collars on suitable sleeves | A plate, collar, sleeve or locking component is damaged or insecure. |
| Floor and footwear | A level nonslip surface and stable footing for the entire lift | The bar rolls unexpectedly, the floor yields or the feet slide. |
| Grip and leg clearance | Full overhand grips outside the legs, with room for hands and knees | You must bend the elbows, trap the hands against the legs or force an extreme grip. |
| Loading access | A demonstrated way to load, unload and settle the bar with hands and feet clear | Loading requires an improvised lever, balancing the bar or reaching under a supported plate. |
| Working and return space | Both plate ends can land on the intended clear surface | People, objects or an uneven edge obstruct the lift or return. |
A suitable lighter bar is valid; twenty kilograms is not a compulsory starting weight. When the floor start remains inaccessible, a separately selected raised start may use matched, purpose-designed supports rated for the task. Arrange them before loading and obtain instruction in their use. Do not build loose stacks, rest the bar on furniture or stand on an improvised platform to make the pull deeper. A raised start changes the range and must be recorded as such. It does not prove that the same load is ready for the floor. If no manageable load and secure start are available, postpone the loaded exercise rather than forcing the reach or adding mass solely to obtain larger plates.
How to Do a Conventional Deadlift: Floor to Stand and Back
Conventional Barbell Deadlift
Use a manageable barbell with matched plates resting securely on the floor. The selected baseline uses a double-overhand grip, hands outside the legs and both feet planted throughout. Rehearse the complete lift and return with appropriate light equipment before choosing working resistance.
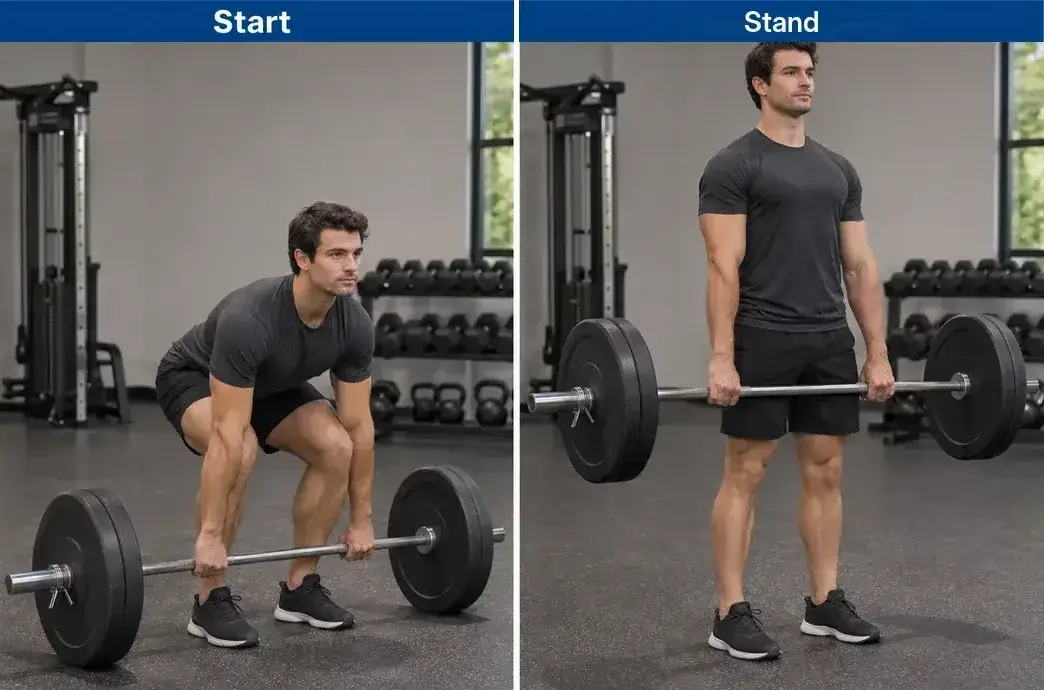
- Check the equipment, level floor, plate retention and clear landing area. Establish a controllable starting height and a load that permits the return as well as the lift. Obtain instruction before working sets if loading or handling is unfamiliar.
- Stand with the bar over roughly the middle of each whole foot, using a comfortable stance around hip width and a natural toe angle. Keep the bar still and leave enough room for the knees to move between the arms; do not force a prescribed distance from the shins.
- Move the hips back and bend the knees enough to reach the bar with both hands just outside the legs. Wrap fingers and thumbs securely around it with both hands over the bar. Keep the arms long; do not curl the bar or sit the hips as low as possible.
- Set a controlled trunk position, with the head broadly in line with the torso and shoulders over or slightly in front of the bar as the setup allows. Prepare a breath and firm the trunk. Build tension smoothly through the grip and body without rolling the bar away or jerking it from the floor.
- Push through the feet and extend the knees and hips together to lift the bar. Keep it close as it passes the shins, without deliberately scraping them. The torso becomes more upright as you rise; do not leave the bar on the floor while throwing the hips upwards.
- Stand tall with the hips and knees comfortably extended and the bar controlled near the thighs. Finish without leaning backwards, shrugging, bending the elbows or resting the bar on the thighs to force the finish.
- Begin the return by moving the hips back while the arms stay long. Let the knees bend as needed to keep the bar close and clear of them. Lower through the same controlled route rather than sending the bar around the knees or forcing an RDL-like fixed knee bend all the way to the floor.
- Place both plate ends on the intended floor surface under control and allow them to settle. Keep your grip until the bar is supported and stable. Do not rebound immediately, release it in mid-air or add another pull while one end is still moving.
- Before another repetition, reset breathing, foot pressure, grip and trunk tension with the bar resting. If it has drifted or the setup needs changing, stop the sequence and reposition only with the load settled. Resume only when the same start is available; do not chase a rolling bar.
- After the final repetition, settle both ends, release the hands only when the bar is stable, then stand without the load and step clear. Record completed repetitions and any altered attempts. A short set does not need an extra lift to finish its handling sequence.
Use a load light enough to keep the start and final return reliable. The first and last repetitions deserve the same attention as the middle ones. A successful upward pull does not prove that the load can be lowered or repeated with control. Both phases shown in the demonstration belong to the same floor-start lift. A still image does not show the whole return or certify a universal hip height. Keep your actual stance, bar, floor-contact diameter, grip and repetition standard in the record.
Find a Repeatable Stance, Grip and Trunk Position
Let the setup fit your proportions
A position that works for one person's limb lengths, bar and plates may not fit another. Use the whole feet for balance and enough knee bend to reach the bar without turning the start into a deep squat. The hips normally begin above the knees and below the shoulders, but a photograph is not an exact angle prescription. Check whether the bar can leave the floor without a large preliminary shift. If the hips repeatedly rise before it moves, review the start and load with light practice rather than immediately diagnosing weak legs or tight hamstrings. Change stance or height only while the bar is resting, and change one feature at a time.
Keep a full grip and long arms
The baseline has both hands over the bar, just outside the legs. Choose enough clearance for the knees without spreading the hands needlessly wide. Grip firmly with the thumbs wrapped and leave the elbows extended; the arms connect you to the bar rather than perform a curl. Mixed and hook grips are different arrangements that need their own instruction. Neither is compulsory to learn this version. A belt or straps do not create a missing start position, fix unexplained pain or make an otherwise uncontrolled load appropriate. Record any such equipment and learn its fitting and release before using it in a demanding set; this guide does not supply a straps or mixed-grip tutorial.
Brace without forcing one shape or one long breath
Prepare the trunk before the bar moves and keep its relationship to the pelvis controlled as the body rises. The torso changes its angle to the floor during the lift; that is different from losing the chosen trunk shape. Do not overarch, force a maximal shoulder-blade squeeze or judge spinal motion from one photograph alone. Use a breathing pattern you can manage with that effort and reset between repetitions. Do not hold one breath through the whole set or pursue the longest possible strain. A prolonged pause while hanging onto the bar is not required. Follow individual advice about exertion or breath holding, and stop for dizziness, unusual breathlessness or other concerning symptoms rather than using a brace as medical clearance.
Lower the Bar and Reset Without Turning the Set Into Bounces
Make room for the bar on the way down
The return combines the hips moving back with enough knee bend to bring the bar to the floor. Keep the bar close and let the knees move without blocking its path. Do not throw the knees forwards immediately and then swing the bar around them, or hold the knees almost fixed while reaching beyond a controllable hinge. Lowering is still loaded work. Select a load you can return to the intended surface without a drop or an uncontrolled last section. This guide is not an emergency escape procedure; do not choose a failing repetition to practise how to lose the bar. Ask for qualified in-person instruction when the complete handling route is uncertain.
Settle the plates, then organise the next pull
A reset means both plate ends are supported and no longer rebounding, with the next start deliberately established. You may keep your grip while resetting or release and regrip once the bar is stable. Neither choice adds a repetition. Releasing the hands while the bar is still moving does not complete a controlled return. Take the time needed to reset; a tempo's zero is not permission to bounce. Conversely, repeated long rests to force isolated repetitions are not silently the same ordinary set. If the next repetition needs a prolonged recovery, end the set and record what happened rather than disguising a series of singles as the unchanged prescription.
Keep a floor pull separate from a standing-start hinge
The Romanian Deadlift guide teaches standing-start, lowering-led repetitions with a different endpoint. Its initial pickup is handling, whereas the floor-to-stand pull is the main lifting phase here. Do not use an RDL load, a floor-reset row or a photograph of a hanging bar to establish your conventional-deadlift starting load or technique. A touch-and-go set also has a different repetition standard from this guide's settled resets. This page does not claim that every other style is invalid; it defines the standard used for its own instruction and log. Compare like with like and label a deliberate change.
Check One Observable Change Before Adding More Load
Describe what changes first: the bar rolling, a heel lifting, an elbow bending, or the landing shifting. Those observations help choose a practical check; they are not diagnoses of a muscle weakness, spinal condition or injury. End the set and settle the bar before adjusting the equipment.
| What you notice | Check first | Practical response |
|---|---|---|
| The start requires an excessive reach | Plate diameter, starting height and whether the selected bar is manageable | Use appropriate lighter equipment or a separately instructed raised start; do not add heavy plates just for height. |
| The hips rise while the bar stays grounded | Initial hip position, bar distance and selected load | Rehearse a start from which knees and hips contribute together instead of repeatedly squatting down before the pull. |
| The bar drifts away or hits the knees | Bar-to-foot position, leg clearance and the lowering sequence | Practise a closer controlled route with a lighter load; do not scrape the legs deliberately. |
| The grip opens or an elbow bends | Grip security, bar condition and load | Settle the bar and reduce the demand; do not curl, regrip in mid-air or assume straps solve the whole problem. |
| The finish becomes a lean, shrug or thigh-supported struggle | The last controlled repetition, load and fatigue | End the set rather than manufacture lockout with a different movement. |
| One end lands first or the next pull rebounds | Level surface, matched plate diameters and return control | Stop and reset the equipment while unloaded or settled; begin only after both ends are stable. |
| Pain, dizziness, numbness or unusual weakness appears | Whether the load can be settled as safely as possible | Stop and seek appropriate advice; do not test several heavier or deeper variations. |
Compare one adjustment with light practice
- Choose one specific observation from the stopped set and secure the bar on its resting surface.
- Check the equipment and rehearse the current setup with an easy demand, using qualified coaching or a permitted fixed-view recording when useful.
- Change one relevant feature, such as a manageable load or front-to-back bar position, without silently changing several variables.
- After adequate recovery, compare only a few controlled repetitions. Do not reproduce pain or turn the check into extra demanding work.
- Keep a useful change only when it resolves the observation without creating another problem. Record it, then perform only appropriate remaining work or stop.
Keep a camera outside the lifting area and respect gym rules and other people's privacy. Review a recording after setting the bar down; do not turn to watch a screen during the pull. Footage can show a changing movement but cannot determine why something hurts or measure an individual muscle's force.
Use Upper/Lower Lower B Without Replacing Its Prescription
The Upper/Lower Split Workout Plan begins Lower B with a choice of trap-bar or conventional deadlift. The unchanged row below is exercise one of seven. Three secondary-squat or leg-press sets and two sets of Bulgarian split squat or reverse lunge per leg follow it, so this first slot is not permission to exhaust all remaining leg work.
| Exercise | Sets & Reps | Rest | Tempo | Target Muscles | Notes |
|---|---|---|---|---|---|
| Trap-Bar or Conventional Deadlift | 2 sets of 3–6 reps | 3–5 min | 2-0-X-1 | Glutes, Hamstrings, Back, Grip | Reset each rep and stop before position or bar control deteriorates. |
Choose one option, not two complete allocations. This guide selects the conventional floor-start, double-overhand version for its worked example. The source row permits a trap bar but does not make its handles, starting height or loading interchangeable with a straight bar. Both sets are bilateral: the two loaded ends do not create separate left and right sets.
Read the tempo from the actual repetition
For 2-0-X-1, use about two seconds for the controlled lowering, no extra deliberately timed bottom hold, an upward phase with controlled acceleration intent and about one second at the standing finish. The first action from the floor is the upward phase even though the notation lists the lowering first. X is intent, not a promised speed or permission to jerk. The source also explicitly requires a reset. Let both ends settle and rebuild the start even though the bottom field is zero. Necessary resetting takes priority over a stopwatch. Do not turn the bottom into a bounce, the top into a shrug or the reset into a compulsory long breath hold.
Select effort for the whole two-set task
The source suggests about two to four good repetitions in reserve for heavy compounds. This illustration selects about three. Repetitions in reserve means further repetitions at the same standard, including the return and reset, not extra attempts with a changed grip, height or finish. Prepare with appropriate easy movement and progressively suitable, non-fatiguing practice. Take the listed three to five minutes between working sets, and enough recovery after preparation to be ready for the first. More rest may be needed; record it. Neither a maximum test nor a fixed starting weight is required. The source's double progression qualifies every working set before considering a small increase, with no automatic weekly rise or second qualifying-session rule. This is an extract, not a complete workout or a learning dose everyone must immediately tolerate. Use instruction and less demanding practice when unfamiliar. Keep the full source plan's schedule and other exercise allocations separate from the examples below.
Progress the Same Floor-Start Record, Not Just the Number
Choose the starting load through manageable practice at the intended height. It must permit at least the lower repetition target with the planned effort, bar control and return. The bar alone can be too heavy; large plates can be light. Do not derive your conventional load from an RDL, a trap bar or a strength-standard chart. Keep the bar, floor-contact diameter, stance, grip, return, reset and actual rest comparable. For this source example, both working sets must reach six with the selected effort and technique before considering a suitable increase. One better first set is not enough. A normal load increase remains in the same exercise history; a changed support, start height or grip is labelled as a changed comparison.
Read a Lower B example without predicting a timetable
These fictional entries are successive comparable Lower B exposures, not consecutive daily sessions or a promised four-week result. They use the same conventional floor start, about three good repetitions in reserve and the source rest and tempo. Total mass means bar plus plates; these sample numbers exclude collar mass, which should be recorded consistently and included when using a total-system mass convention.
| Lower B exposure | Bar-plus-plate load (kg) | Set 1 reps | Set 2 reps | Total reps | Decision |
|---|---|---|---|---|---|
| 1 | 60 | 5 | 4 | 9 | Keep the load and build controlled repetitions in both sets. |
| 2 | 60 | 6 | 5 | 11 | The second set remains below six; do not increase yet. |
| 3 | 60 | 6 | 6 | 12 | Repetition targets met; check effort, start, return and recovery before increasing. |
| 4 | 62.5 | 4 | 3 | 7 | One possible result after a suitable increase, not a promised outcome. |
The totals are 9, 11, 12 and 7. The smaller total after an increase does not itself show regression, but the new load must still fit both sets and the complete handling standard. Remaining at 60 kg is valid when the increment or readiness is unsuitable. None of these values is a recommended starting weight. With a known 20 kg bar, 20 kg of plates on each end gives 20 + 20 + 20 = 60 kg, excluding the collars in this illustration. Adding 1.25 kg to each end adds 2.5 kg altogether, giving 62.5 kg. It does not add 2.5 kg per end. Keep the same supporting plate diameter; adding smaller change plates does not require a higher start. Use only compatible, securely retained loading.
An unsuitable increase does not earn extra sets
If the first working set stops after two repetitions, it still counts as one performed set even though it misses three. Settle the bar and reassess. A manageable reduction may be used for at most the one remaining suitable set, with the changed loads recorded. Do not retest until the short result disappears or add two replacement sets. If no appropriate increment is available, repeat useful work or deliberately revise the programme; do not hide the change by bouncing, raising the bar or shortening the return. An isolated late-set shortfall calls for checking rest and recovery before diagnosing a plateau. The guide to reps dropping between sets covers that wider decision without changing this two-set allocation.
Keep Work Already Done When the Load or Setup Changes
Use the two-set allowance for the selected Lower B slot, not as a fresh allowance for every variation you try. A completed or stopped working set stays in the record. Genuine easy preparation is different, but a demanding trial does not become a warm-up merely because it missed the lower target.
| Situation | Working sets already performed | At most still available | What the record means |
|---|---|---|---|
| No working set has started | 0 | 2 suitable sets | Preparation is recorded separately. |
| The first working set is complete or stopped | 1 | 1 suitable set | Even two repetitions use one working set. |
| Both working sets have been done | 2 | None in this slot | A different load or start does not restart the allocation. |
| Two original sets followed by two replacement sets | 4 | None; additional work has been added | Two plus two is four, not the original two. |
| Symptoms stop the exercise after one set | 1 | Stop; no catch-up set is required | Record the stopped work and obtain appropriate help. |
A same-session reduction in load can retain the original floor-start task when continuing is appropriate. Changing to raised supports or a trap bar is a different recorded setup, not a way to relabel the first set as preparation. Use only an already learned suitable alternative, or postpone the new setup rather than learn it under fatigue. The caps above are practical accounting for this example, not proof that different exercises produce equal fatigue or muscle stimulus. They do not automatically convert two bilateral sets into work for each leg. The guide to counting workout sets explains why equal written totals need not represent equal training. A set may contain fewer acceptable repetitions than attempts. For example, five controlled resets followed by one bounced attempt give five qualifying repetitions and six attempts, not six qualifying repetitions. Record the altered attempt and stop; this example is not an instruction to perform it. The completed set remains one set, and extra singles are not owed.
Choose a Different Start or Exercise for a Specific Constraint
Conventional floor pulling is a useful skill when it matches the goal and equipment, not a compulsory test of whether someone is allowed to train. A different start or implement can solve one constraint while introducing another. Choose the complete setup deliberately and establish an appropriate record rather than searching for a universally safest version.
| Option | What changes | Boundary to keep clear |
|---|---|---|
| Raised-start straight-bar pull | Matched purpose-designed supports raise the resting bar and shorten the range | Learn the support and landing setup; the result is not an unchanged floor-pull record. |
| Trap-bar deadlift | Handle position, available height, stance and resistance path change | It is permitted by the quoted source row, but needs its own instruction and load selection. |
| Romanian deadlift | Working repetitions start standing and reverse a hinge without obligatory floor contact | It is not a direct floor-pull substitute, and Lower A already has its own RDL allocation. |
| A different taught leg or hip-extension exercise | Support, joint action and the workout role may change | Revise the complete programme when needed; matching sets does not establish equivalent work. |
The Leg Exercises guide covers wider squat, hinge and supported-exercise choices. Do not add a second RDL allocation or another leg workout simply because the conventional slot is unsuitable. Sumo, deficit, rack and single-leg pulls are not extra tutorials hidden in this guide, and a floor-start photograph does not teach their controls or handling. For a specific competition goal, use the Powerlifting Workout Plan for the wider programme context and check the actual federation's current rules separately. This tutorial is not a referee's ruling, equipment certification or proof of a competition-standard lift. It does not require a maximal attempt to validate the technique. An unsuitable exercise can be omitted or deliberately replaced without finding the answer during the same session. Changing the bar or start height is not treatment for unexplained pain, and the floor need not become a mandatory destination after raised practice.
Know When to Stop and How to Revisit the Lift
End the set before grip, balance, bar control or the planned return becomes unreliable. Put the bar down as safely as possible and step clear of unstable equipment. A planned repetition target does not require another pull after the movement or circumstances have changed.
Symptoms are not a technique diagnosis
Sharp or worsening pain, spreading symptoms, unusual weakness, numbness or dizziness calls for stopping and appropriate advice rather than more loaded comparisons. Persistent or recurring back pain that limits normal activities, disturbs sleep or causes concern warrants healthcare assessment. A video, a stretch sensation or the shape of the back cannot establish the cause. Seek urgent medical advice for sudden severe or rapidly worsening back pain, or back pain accompanied by feeling hot, cold, shivery or generally unwell. Do not wait for all those features to occur together or use a lighter test to decide whether assessment is needed. Seek immediate emergency assessment for back pain with new pain, tingling, weakness or numbness in both legs; loss of feeling around the genitals or anus; new bladder, bowel or sexual-function changes; or pain after a serious accident. Tight or squeezing chest pain, pain spreading from the chest to an arm, neck or jaw, severe breathing difficulty or someone unresponsive also requires emergency help. Use the appropriate local service. These are examples, not an exhaustive checklist or a diagnosis.
Revisit a resolved technical or equipment problem
- Resolve the actual loading, floor or setup issue first. Symptoms and individual restrictions take priority over this technical check.
- Rehearse a few light floor-to-stand repetitions and their complete return with the intended bar, height and grip. Do not treat a symptom-provoking test as practice.
- Choose manageable resistance only when the start, movement and reset remain repeatable. Label any changed height or implement rather than claiming the previous load is already suitable.
- Resume only appropriate work within the actual plan and recovery, preserving sets already done. Stop when the issue remains unresolved; there is no catch-up allocation.
This is not rehabilitation clearance or a return-after-injury protocol. Follow individual advice after illness or injury rather than interpreting one comfortable repetition, a brace or this four-step sequence as permission for demanding lifting.
Conventional Deadlift FAQs
What makes a deadlift conventional?
The straight bar begins in front of the body, with the hands outside the legs and the feet in a relatively narrow stance that fits the lifter. This guide teaches a complete floor reset between repetitions, rather than claiming that every use of the word conventional has the same tempo or repetition style.
Which muscles does it train?
The glutes, hamstrings and quadriceps contribute to moving the hips and knees, with the trunk, upper back and grip supporting the load. The movement is not a back isolation exercise, and muscle involvement does not establish identical growth or set credit for every named muscle.
How is it different from a Romanian deadlift?
The conventional version here lifts from the supported floor start and returns to it. RDL working repetitions begin standing, lower into a controlled hinge and return upright without a compulsory floor touch. Their loads and range records are not interchangeable.
How high should the bar start?
Use matching plate diameters and a floor start you can reach and control with a suitable load. Larger diameter does not have to mean heavier mass. A raised start on intended supports is a separately recorded version, not a correction everyone must eventually remove.
Do I have to begin with a 20 kg bar?
No. Choose equipment that fits your learning and handling ability. A lighter suitable bar and compatible plates are valid. Do not add heavy plates just to raise a bar or assume the illustrated load is a recommendation for you.
Should I lower my hips as far as possible?
No. Find a start from which the knees and hips can contribute without a large preliminary shift or the knees blocking the bar. Individual proportions affect hip height; neither a deep squat nor one copied back angle is compulsory.
Do I need mixed grip, straps or a belt?
Not for the selected baseline. It uses full double-overhand grips at a manageable load. Other grips and aids need their own instruction and record; they do not make an unsuitable start, painful movement or uncontrolled return appropriate.
Should I hold one breath for the whole set?
No. Prepare the trunk for each pull and reset breathing as needed with the bar supported. Do not pursue prolonged maximal straining or ignore individual advice about exertion. Stop for dizziness, unusual breathlessness or other concerning symptoms.
Does zero at the bottom of 2-0-X-1 mean I should bounce?
No. The quoted source explicitly requires a reset. Both ends must settle and the next start must be established; zero means no extra deliberately timed bottom hold, not the absence of support or control.
When should I increase the load in the example?
Both sets must reach six with the intended effort, start, return, reset and recovery before a suitable small increase is considered. One strong set or a calendar week is not enough, and repeating a usable load remains valid. There is no separate two-qualifying-session requirement.
Does a two-repetition first set need replacing?
No. It is one performed working set even though the example's range starts at three. At most one suitable set remains after reassessing the load and recovery. Stop instead when symptoms or unreliable control make continuation inappropriate.
What should I do if my back hurts?
Stop rather than use heavier pulls, a deeper start or another grip to diagnose the problem. Persistent or concerning symptoms need appropriate assessment, with urgent and emergency signs acted on promptly. This guide does not establish an injury's cause or clear a return to training.