
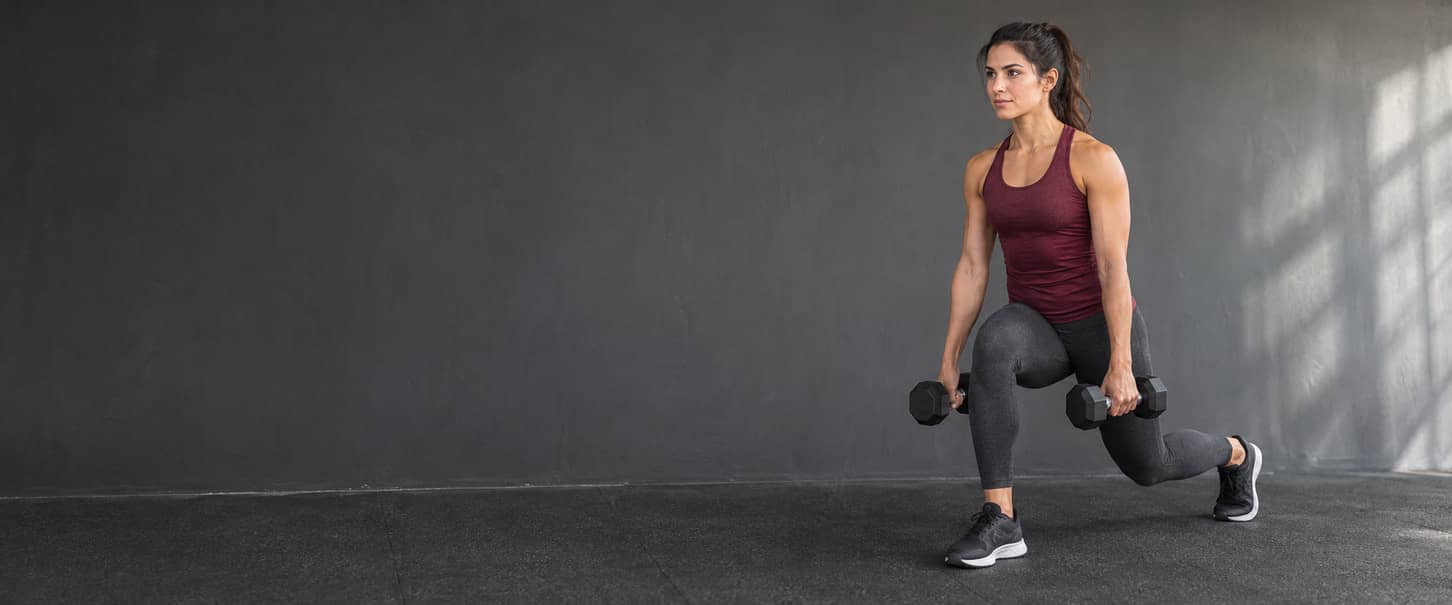
3-Day Dumbbell Workout: Full-Body Training Without a Bench
Train three non-consecutive days with suitable dumbbells and clear floor space. Follow Workout A, then B, then C; use the same sequence again when ready. No bench, cable station, resistance band or pull-up bar is needed. The plan combines dumbbell exercises with deliberate bodyweight hamstring and trunk work. The normal sessions contain six or seven exercises with two working sets per row. Your first complete A/B/C cycle uses one working set per row, including one on each side where stated. Build to the normal allocation only when the movements, handling and recovery are manageable. Choose weights for each exercise rather than trying to use one fixed pair for everything. This is a general strength and muscle-building option for adults who can learn and repeat these movements. It is not a maximum-strength programme, an injury-rehabilitation plan or a promise of results in eight weeks. Read the equipment, rest and counting rules before using the tables; the complete exercise instructions follow them.
Check the Dumbbells, Floor Space and No-Bench Limits
You need adjustable dumbbells or several fixed pairs covering lighter raises and heavier squats, presses and rows. A matched pair is used wherever both hands hold a dumbbell; the goblet squat uses one. Check that the handles, locks and plate retention are intact and that the manufacturer permits the orientation used, particularly the goblet hold and floor press. A mat is optional padding, not a requirement to slide. The floor and any mat must remain secure. There must be enough room to lie down, reach overhead, change stance and put the weights down without striking furniture or another person.
| Requirement | What to check | Limit to recognise |
|---|---|---|
| A suitable range of dumbbell loads | Secure retention, full grips and permitted holding orientations | One pair may be too heavy for raises and too light for leg work. |
| Clear nonslip floor space | Room for the whole body, both weights and a controlled return | A sofa, chair or bed does not become an exercise bench. |
| Overhead clearance | Both dumbbells can move through the chosen standing press | Do not arch or twist to press around an obstruction. |
| Floor access and weight handling | You can lie down, stand up and settle the weights under control | Pressing strength alone does not establish a workable floor-press entry. |
| A way to record actual work | A notebook or ordinary notes are enough | No app, downloadable log or new tracker feature is required. |
Rows supply loaded pulling, but this plan has no overhead vertical pull. Hamstring walkouts are not a machine-curl equivalent, and floor pressing does not reproduce a bench's full lower range or incline. The row also requires maintaining your own hinge: there is no external chest support. These are real equipment limits, not missing exercises to append automatically. When appropriate loads or handling are unavailable, use the stated easier rehearsal or change the plan rather than improvising equipment. The No-Equipment Home Workout Plan is a separate option with its own pulling limitations; it is not a substitute to perform alongside this entire week.
Train A, B and C With Recovery Between Sessions
Use Monday, Wednesday and Friday as an example, not compulsory dates. Keep at least one full non-training day between these full-body sessions, including between C and the next A, and take more recovery when needed. Ordinary comfortable activity can continue on recovery days; they are not spare days for another hard lifting programme.
| Day | Plan | What happens next |
|---|---|---|
| Monday | Workout A | Recover before B. |
| Tuesday | Recovery | No catch-up lifting session. |
| Wednesday | Workout B | Recover before C. |
| Thursday | Recovery | Keep the next session manageable. |
| Friday | Workout C | Recover before starting A again. |
| Saturday | Recovery | Comfortable activity only as it fits recovery. |
| Sunday | Recovery | Start the next A when ready. |
For the first complete cycle, keep every exercise but perform one working set per row. A split-squat or side-plank row means one set on each side; a dead-bug row means one alternating set containing both sides. Use lighter demands and leave about three to four good repetitions in reserve for ordinary dynamic lifts. Choose shorter controlled walkouts, reaches and holds rather than trying to estimate seconds in reserve. After that first cycle, move towards the normal two-set rows only when you can handle the exercises, keep their standard and recover for the next session. Repeat the reduced cycle when needed. It is not a compulsory one-week promotion, and adding a set is itself a change: do not automatically increase weight at the same time.
Choose Starting Loads, Prepare and Rest Between Sets
Begin with loads you can position, move and put down securely. After genuine light preparation, choose a weight that lets you reach the lower end of the table's range with about two to three further repetitions available at the same standard. Use the easier introductory effort described above while learning. No male or female starting-weight chart, maximum test or conversion from a barbell lift is required. Repetitions in reserve is an estimate, not a reason to demonstrate failure. Grip, balance, range and the planned exit can end a set before muscular effort does. A short working set still happened; it does not become a warm-up because it missed the target.
Prepare without spending the working sets
Check the equipment and clear the floor. Use comfortable general movement as needed, then rehearse the day's squat, hinge, press and row with an easy load or body position. Add short, non-fatiguing preparation sets when a heavier working load or unfamiliar setup needs them. A fixed warm-up set count is not required, and a demanding test is not free preparation. Before floor pressing, rehearse getting down and back up with light weights. Before the standing press, establish how the pair reaches shoulder height and returns. A safe finish is part of choosing the load, not something to solve after tiring.
Take the complete rest, including between sides
Perform straight sets: finish an exercise's assigned work before moving to the next row. Use the listed rest between working sets and before starting the next exercise. Take longer when breathing, grip or setup is not ready, and record that change rather than pretending the shorter interval was used. The plan has no hidden supersets or timed circuit. For the split squat and side plank, do the left side, take the listed rest, do the right side and rest again before repeating the pair. Keep that side order for comparisons. Dead bugs are different: alternate sides inside one set, complete the assigned repetitions on both sides, then rest. Changing sides is not the rest itself.
Read tempo for the actual movement
For squats and Romanian deadlifts, 3-1-1-0 means roughly three seconds lowering, one at the controlled lower position, one returning and no deliberately prolonged top pause. For floor and shoulder presses, 2-1-1-0 uses a two-second lower, a controlled one-second lower pause and about one second pressing. Zero does not mean bounce. Rows use 2-1-1-1: two seconds returning the arms to the hanging reach, one at that reach, one pulling and one at the finish. The first movement is the pull even though the notation lists the return first. Raises and curls use 2-0-1-1. Calf raises use 2-1-1-1 with a controlled heel contact and a top pause. Dead-bug 2-1-2-0 describes two seconds reaching out, one at the controlled reach, two returning and no deliberate extra pause before the other side. Walkouts use small controlled steps, not an invented four-part lifting cadence; side planks use steady breathing holds. These are repeatability cues, not claims that these timings uniquely maximise growth. Breathe throughout and allow any necessary reset.
The Three Full-Body Dumbbell Workouts
Use the normal tables below after the introductory cycle is manageable. During the introduction, change every two-set row to one set, keeping the exercise, repetition or time range and side convention. Complete one session, not all three together. Read the linked on-page technique entry before performing an unfamiliar exercise. A starts with the bilateral squat, B starts with the per-leg squat and C starts with the hinge. Pressing separates some lower-body and rowing work, but the unsupported row still demands trunk control. Later small-muscle and trunk work does not replace an unmanageable main lift. The order is a practical choice for this programme, not a claim of uniquely optimal muscle growth.
Day 1: Workout A
| Exercise | Sets & Reps | Rest | Tempo | Target Muscles | Notes |
|---|---|---|---|---|---|
| Goblet Squat | 2 sets of 8–12 reps | 2–3 minutes | 3-1-1-0 | Quadriceps, glutes, adductors | One dumbbell; choose a hold and depth you can repeat. |
| Dumbbell Floor Press | 2 sets of 8–12 reps | 2–3 minutes | 2-1-1-0 | Chest, anterior deltoids, triceps | Two dumbbells; control floor entry, upper-arm contact and set-down. |
| Bent-Over Dumbbell Row | 2 sets of 8–12 reps | 2–3 minutes | 2-1-1-1 | Lats, upper back, rear deltoids, elbow flexors | Both arms together; keep the chosen hinge without chest support. |
| Dumbbell Romanian Deadlift | 2 sets of 8–12 reps | 2–3 minutes | 3-1-1-0 | Hamstrings, glutes; trunk and grip support | Begin each working repetition standing; no required floor touch. |
| Dumbbell Lateral Raise | 2 sets of 12–20 reps | 60–90 seconds | 2-0-1-1 | Lateral deltoids, shoulder-blade muscles | Both arms together; no body swing or forced arm angle. |
| Dead Bug | 2 sets of 6–10 reps per side | 60–90 seconds after the complete alternating set | 2-1-2-0 | Abdominals and trunk stabilisers | Alternate opposite arm-and-leg reaches within each set; count each side. |
Workout A has six rows. Both arms move together in the press, row and raise, and both legs work together in the goblet squat and hinge. The final dead-bug sets alternate sides internally; they are not two separate sets for each side. Use the one-dumbbell mass for the goblet squat and the mass per dumbbell for paired lifts. The row precedes the Romanian deadlift here. If maintaining the row's hinge has already exhausted your trunk or grip, take more recovery and reassess the later hinge rather than forcing it through a changed position.
Day 2: Workout B
| Exercise | Sets & Reps | Rest | Tempo | Target Muscles | Notes |
|---|---|---|---|---|---|
| Dumbbell Static Split Squat | 2 sets of 8–12 reps per lead leg | 90–120 seconds after each side | 3-1-1-0 | Quadriceps, glutes, adductors | Both feet on the floor; keep the same front leg throughout each side set. |
| Standing Dumbbell Shoulder Press | 2 sets of 8–12 reps | 2–3 minutes | 2-1-1-0 | Deltoids, triceps | Two manageable dumbbells; no leg drive or growing back arch. |
| Bent-Over Dumbbell Row | 2 sets of 8–12 reps | 2–3 minutes | 2-1-1-1 | Lats, upper back, rear deltoids, elbow flexors | Both arms together; keep the chosen hinge without chest support. |
| Hamstring Walkout | 2 sets of 4–8 complete out-and-back cycles | 60–90 seconds | Controlled steps | Hamstrings, glutes; trunk support | One whole journey out and back is one cycle; no sliding or added weight. |
| Dumbbell Hammer Curl | 2 sets of 10–15 reps | 60–90 seconds | 2-0-1-1 | Biceps, brachialis, brachioradialis | Both arms together, palms inward; keep the trunk steady. |
| Standing Dumbbell Calf Raise | 2 sets of 10–20 reps | 60–90 seconds | 2-1-1-1 | Gastrocnemius and soleus | Both feet on level floor; controlled heel contact, no loose step. |
| Side Plank | 2 sets of 15–30 seconds per side | 45–60 seconds after each side | Steady breathing hold | Obliques and lateral trunk stabilisers | Choose a knee- or foot-supported version; lower before resting and switching. |
The split squat has two sets with each leg leading, separated by the stated rest after every side. The side plank likewise has two separate holds on each side. All other rows use two bilateral sets, except that walkout repetitions are complete out-and-back cycles. Do not halve the side-specific prescription or double the bilateral sets. The standing press uses a light enough pair for its whole handling sequence. Walkouts provide a different hamstring task from the RDL; do not add another RDL or a dumbbell trapped between the feet to make B resemble a machine-based leg session.
Day 3: Workout C
| Exercise | Sets & Reps | Rest | Tempo | Target Muscles | Notes |
|---|---|---|---|---|---|
| Dumbbell Romanian Deadlift | 2 sets of 8–12 reps | 2–3 minutes | 3-1-1-0 | Hamstrings, glutes; trunk and grip support | Begin each working repetition standing; no required floor touch. |
| Dumbbell Floor Press | 2 sets of 8–12 reps | 2–3 minutes | 2-1-1-0 | Chest, anterior deltoids, triceps | Two dumbbells; control floor entry, upper-arm contact and set-down. |
| Bent-Over Dumbbell Row | 2 sets of 8–12 reps | 2–3 minutes | 2-1-1-1 | Lats, upper back, rear deltoids, elbow flexors | Both arms together; keep the chosen hinge without chest support. |
| Goblet Squat | 2 sets of 8–12 reps | 2–3 minutes | 3-1-1-0 | Quadriceps, glutes, adductors | One dumbbell; choose a hold and depth you can repeat. |
| Dumbbell Lateral Raise | 2 sets of 12–20 reps | 60–90 seconds | 2-0-1-1 | Lateral deltoids, shoulder-blade muscles | Both arms together; no body swing or forced arm angle. |
| Standing Dumbbell Calf Raise | 2 sets of 10–20 reps | 60–90 seconds | 2-1-1-1 | Gastrocnemius and soleus | Both feet on level floor; controlled heel contact, no loose step. |
| Dead Bug | 2 sets of 6–10 reps per side | 60–90 seconds after the complete alternating set | 2-1-2-0 | Abdominals and trunk stabilisers | Alternate opposite arm-and-leg reaches within each set; count each side. |
C uses the same defined Romanian deadlift, floor press, row, goblet squat, raise, calf raise and dead bug taught for this plan. The changed order means its records are compared with other C sessions, not automatically with A. You may need a different appropriate load later in the session. After C, recover before the next A. The name full body describes the schedule's broad upper- and lower-body work, not isolated training of every muscle in every session. There is no extra finisher.
Learn the Squat, Hinge, Walkout and Calf Movements
These five entries supply the complete lower-body instructions used in the tables. Learn the movement and the way to put the weight down before adding working resistance.
Goblet Squat
The goblet squat uses one suitable dumbbell held near the chest. Your grip and the dumbbell design must permit that orientation. It is a squat, not a challenge to hold the heaviest object available.
- Check the handle and retention system, then rehearse picking up a light dumbbell and bringing it close to the chest with both hands. Use instruction when the pickup or return is uncertain.
- Choose a comfortable stance with heels and forefeet supported. Hold the weight securely with both hands; a two-handed goblet hold leaves no free hand for balance support.
- Bend the hips and knees together while the weight stays close. Let the knees travel with the feet instead of forcing vertical shins or one compulsory toe angle.
- Lower through a range you can repeat without pain, lost balance or a marked uncontrolled change in the trunk. Pause without resting the weight on the thighs or bouncing.
- Extend the hips and knees to stand. Keep whole-foot support and finish without leaning backwards or changing the grip to rescue the repetition.
- End while the weight can still be lowered and set down through the rehearsed route. Confirm it is supported before releasing it; do not force extra repetitions after the hold fails.
Practise without a weight or use a lighter suitable dumbbell when needed. Record the one-dumbbell mass, stance and lower endpoint. If the hold remains the limiting task, more leg effort does not repair that handling problem.
Dumbbell Romanian Deadlift
Each Romanian deadlift working repetition starts standing, hinges down and returns to standing. Picking up the dumbbells and finally putting them down are handling movements, not extra RDL repetitions.
- Clear the floor and rehearse a controlled pickup with a manageable pair. Bend the hips and knees as needed to reach the weights, take full grips and stand; obtain instruction when that handling is unfamiliar.
- Stand with one dumbbell close to each thigh and feet securely supported. Soften the knees and prepare the trunk without holding one breath for the whole set.
- Move the hips backwards while the dumbbells stay close to the legs. Keep the chosen knee bend broadly stable rather than turning the descent into an increasingly deep squat.
- Reverse at the deepest hinge you can control with the selected trunk relationship, balance and grip. Floor contact, straight knees and a universal shin height are not targets.
- Extend the hips to return to standing without leaning backwards or shrugging the weights. Reset breathing before another controlled repetition.
- Finish before grip or trunk control fails. Return the weights to the floor through the rehearsed pickup pattern in reverse, bending the knees as required; do not force the final set-down to use RDL depth.
A shorter controlled hinge or lighter pair can be a useful learning adjustment. Keep its actual range visible in the record. The Romanian Deadlift guide develops the hinge further; its separate examples do not replace this programme's two-set prescription.
Dumbbell Static Split Squat
This is a static split squat with both feet on the floor and two dumbbells at the sides. The front leg names the working side; the rear leg still assists. It is not a rear-foot-elevated Bulgarian split squat or an alternating lunge.
- Rehearse without weights on a clear nonslip floor. Set a staggered stance with some side-to-side width, the whole front foot supported and the rear heel naturally raised.
- For the loaded version, return to stable standing, pick up two manageable dumbbells with full grips, then establish the same stance. Two occupied hands cannot also provide hand support.
- Keep the same front leg throughout the set. Bend both knees and lower between the feet, allowing a comfortable torso inclination and natural front-knee travel.
- Reverse before the rear knee strikes the floor, balance changes or pain appears. Do not force an exact stance distance or use a bounce to reach farther.
- Rise into the same staggered top position. Retain the feet in place rather than stepping, jumping from the rear leg or progressively changing torso angle.
- End while stable. Bring the feet back into a secure standing position, then put the dumbbells down under control before turning or changing the lead leg.
- Rest for the listed 90–120 seconds, then repeat with the other leg leading. Rest again before another round. Stop earlier if either side loses control; symptoms do not create a duty to catch up on the other side.
Use bodyweight or a shorter manageable range while learning. This two-dumbbell version does not include hand support. A supported variant requires its own safe arrangement and load record, not an imaginary third hand.
Hamstring Walkout
The hamstring walkout uses a low bridge and small heel steps. One complete trip out and back counts as one cycle. You need floor grip, not sliders, a bench or a dumbbell held between the feet.
- Lie on your back with knees bent, heels planted and arms resting beside you for light support. Check that the floor and footwear will not slide.
- Lift the pelvis into a modest bridge while keeping the ribs and pelvis controlled. Do not create height by repeatedly arching the lower back.
- Take small alternating heel steps away from the body, roughly one second per step. Keep the hips controlled and retain some knee bend.
- Stop travelling outward before the hips sag, the heels slip, cramping begins or the trunk position changes. A few short steps can be enough; fully straight legs are not required.
- Walk the heels back to the same starting position under control. Lower the pelvis briefly to reset. That whole out-and-back journey is one cycle, not one repetition per heel step.
- Repeat only through the same manageable travel. End the set at the target or sooner for lost control, then rest. Keep the chosen outward reach and step pattern in the record.
Shorten the journey before chasing more cycles. A stationary bridge can help you learn the starting position, but it does not complete the prescribed walkout. The Leg Curl Alternatives guide explains the separate knee-flexion choices; this walkout is not a proven machine-curl-equivalent dose.
Standing Dumbbell Calf Raise
Both feet stay on a level floor for this calf raise. Hold one manageable dumbbell at each side. There is no raised platform, balance trick or single-leg requirement.
- Pick up the dumbbells with full grips and stand on a nonslip floor with comfortable foot spacing. Keep the knees comfortably near straight, not forced backwards.
- Establish balance before rising. With two dumbbells held, there is no free hand to use a wall.
- Raise both heels through an ankle range you can control while pressure remains through the forefeet. Avoid rolling onto the outer edges of the feet.
- Pause briefly at the top without swaying or adding a knee dip. Keep breathing.
- Lower both heels steadily to the floor and pause without bouncing. The floor defines the baseline lower endpoint; do not stand on loose plates to obtain a deeper stretch.
- End before balance or grip fails, stand with heels supported and put the dumbbells down securely.
Start with bodyweight when the pair prevents balance. Light contact with a fixed wall is an unloaded learning option, not the same loaded record. Repetitions and a suitable load increase come before an unplanned switch to per-leg work.
Learn the Floor Press and Standing Shoulder Press
Both presses use two weights, but the floor press supplies torso support and the standing press does not. Keep their loads and ranges separate.
Dumbbell Floor Press
Use two manageable dumbbells on a firm nonslip floor, with optional stable padding. The upper arms meet the floor gently or stop at an earlier comfortable endpoint; this is not an inclined or full-range bench press.
- Clear space beside the torso for a controlled set-down and check the dumbbells' retention system. Learn the whole entry and exit with a light pair before choosing working weights.
- Sit with knees bent and the weights controlled close to the body. Bring the pair into a manageable close-to-chest position as you settle onto your back, or use a trained handoff. Do not start with an awkward heavy pickup while already lying down.
- Keep the head, upper back and pelvis supported and the feet planted. Settle both dumbbells at a controlled top over the chest, with fingers and thumbs around the handles and the wrists supported over the forearms.
- From the controlled top, lower along a comfortable elbow path. Keep the weights clear of the face and avoid forcing an extreme flare or a prescribed grip width.
- Pause when the upper arms gently meet the floor, or at the earlier endpoint chosen in practice. Do not hit the elbows, bounce or raise the hips to manufacture more travel.
- Press back up without colliding the dumbbells or twisting to finish one side. Both arms move together and the chosen body supports remain in contact.
- End while the rehearsed set-down or trained-assisted return is still available. Settle the weights securely before getting up. Do not throw them, twist beneath a failing pair or force a loaded sit-up to escape.
Use a lighter pair when entry or exit is the limiting factor. When no manageable pair and return are available, omit the unsuitable work and review the plan rather than forcing a press. The Bench Press Alternatives guide teaches other choices, but changing exercise or equipment is a deliberate adaptation, not another set allocation.
Standing Dumbbell Shoulder Press
This standing press uses two dumbbells and adequate overhead clearance. It has no backrest and is not a leg-driven push press. Choose the pair by your ability to bring it to the start and return it, not just lift it overhead.
- Check clear standing and overhead space, then pick up a light enough pair with full grips. Rehearse bringing both weights to shoulder level without a heavy ballistic clean, twisting or an unstable backward lean.
- Stand with stable feet and settle the weights near shoulder level. Choose a comfortable hand orientation and elbow path with the wrists supported over the forearms.
- Firm the trunk while breathing normally between efforts. Keep the pelvis and ribcage controlled rather than setting a large back arch to make room.
- Press upward through a controllable path, allowing the shoulder blades to move with the arms. Do not dip the knees, kick the weights up or force both dumbbells to collide.
- Lower steadily to the same comfortable shoulder-level position. End the set if the return shortens or trunk movement replaces the press.
- Bring the pair back down through the light-load route you rehearsed and set it securely on the floor. Stop before a failed overhead repetition makes that return unavailable.
Reduce the load when the start cannot be established. Symptoms or genuinely inadequate overhead clearance are reasons to stop this slot, not press around an obstacle or invent a seated furniture version.
Learn the Row, Lateral Raise and Hammer Curl
These movements have different arm paths and load requirements. The row does not become a vertical pull, and a heavier raise obtained through curling is not unchanged lateral-raise progress.
Bent-Over Dumbbell Row
The row uses two dumbbells together while you hold a hip hinge. It is not a one-arm supported row, and the floor does not support the weights between working repetitions.
- Pick up a manageable pair with full grips and stand on a nonslip floor. Confirm a controlled route for putting both weights down.
- Soften the knees and move the hips back into a hinge you can maintain. Let the arms reach down beneath the shoulders with the weights clear of the floor and legs.
- Keep the head aligned with the trunk and whole-foot balance steady. Choose a comfortable palms-in or modestly turned grip and keep it the same for comparisons.
- Bend the elbows and move the upper arms back near the torso. Finish where the arm movement remains controlled, without standing up, shrugging or crashing the weights into the body.
- Lower into the same controlled reach while retaining the hinge. Let the shoulder blades move with the arms instead of holding a permanent maximal squeeze.
- End before grip or trunk endurance makes the row a heave. Stand with the weights controlled, then settle them through the rehearsed route before releasing your hands.
Use lighter weights or a more manageable recorded range while learning. If holding the hinge repeatedly ends the set first, this no-bench arrangement may not meet your pulling needs. Extra sets and an improvised chair support do not resolve that limit.
Dumbbell Lateral Raise
Use a light dumbbell in each hand, clear arm space and the same comfortable elbow bend throughout. The movement raises the upper arms rather than curling the weights towards the shoulders.
- Pick up the pair securely and stand with stable feet, weights beside or slightly in front of the thighs and full grips.
- Set a small comfortable elbow bend and wrists aligned with the forearms. Keep the torso and knees steady without forcing a rigid pose.
- Raise the upper arms outward through a comfortable arc, often a little forward of directly sideways. Allow the shoulder blades to move naturally.
- Use a repeatable upper endpoint; around shoulder height is a reference, not a mandatory angle or universal safety limit. Do not force a thumbs-down twist.
- Lower along the same arc without dropping onto the thighs or swinging into the next raise. Keep the selected elbow bend.
- Finish before torso swing, sudden shoulder hiking or progressively shortened travel changes the task, then put the weights down securely.
The Lateral Raise guide gives additional setup and increment checks. Its worked source-plan prescription is separate: retain the two sets, range and 2-0-1-1 tempo used here.
Dumbbell Hammer Curl
The hammer curl bends both elbows together with the palms facing inward. Rows already involve the elbow flexors; this is the small direct curl allocation in B, not permission to append an arm workout.
- Pick up two manageable dumbbells and stand securely with the arms beside the body and palms facing each other.
- Keep full grips, wrists comfortably aligned and the trunk steady. Select an elbow range you can repeat.
- Bend both elbows to raise the dumbbells without swinging the hips or throwing the upper arms forward.
- Pause at a controlled finish with the same palms-in orientation. Do not lean backwards to lift farther.
- Lower steadily without snapping the elbows straight or changing the grip midway through the set.
- End before swing or an unreliable grip replaces the curl, then set the weights down under control.
Reduce the load when the wrist or trunk cannot remain controlled. Keep this neutral-grip record separate from a deliberately supinated or alternating curl.
Count Dead Bugs and Side Planks in Their Own Units
Dead bugs alternate repetitions within a set. Side planks complete separate timed bouts on each side. Neither task requires a failure test or extra abdominal circuits.
Dead Bug
Lie on a secure floor or mat and alternate opposite arm-and-leg reaches. A left-side repetition is named by the left leg reaching while the right arm reaches; a right-side repetition uses the opposite pair.
- Lie on your back with knees and hips comfortably bent and arms above the torso. Establish a ribcage and pelvis relationship you can maintain while breathing.
- Reach the left leg and right arm away through a manageable range. Keep the other limbs ready without pushing the trunk into a forced shape.
- Pause briefly at the controlled reach, then return that arm-and-leg pair. One complete reach and return is one left-side repetition.
- Repeat with the right leg and left arm, then continue alternating. Use the same chosen reach rather than extending farther as control is lost.
- Finish when each side reaches the target or sooner if the trunk position or breathing changes. The whole alternating sequence is one set; only then take the listed rest.
- Return the limbs to a comfortable supported position, roll onto a side and sit up under control. Record the repetitions actually completed on each side, including an uneven final pair if stopped early.
Shorten the reach or retain a more bent knee when needed. Do not force the lower back flat or insist that the heel touches the floor. Individual limb rehearsals can help you learn but do not count as completed alternating working sets.
Side Plank
The side plank is a timed hold on one forearm and the chosen lower-body supports. Use one consistent knee-supported or foot-supported version; no dumbbell is placed on the body.
- Lie on the left side on a nonslip surface with the left forearm supported and elbow near the shoulder in a comfortable position. Clear space to lower the hips.
- Choose a bent-knee version for a shorter lever, or a straight-leg version with secure foot contact. Set the support before lifting rather than changing it under fatigue.
- Raise the pelvis into a controlled line through the trunk and supported lower body. The head stays aligned; do not twist the chest upward to hold longer.
- Breathe steadily for the prescribed time, ending sooner if the hips sag, the body rolls or the supporting shoulder becomes painful.
- Lower the pelvis onto the floor before resting for 45–60 seconds. Reposition and mirror the setup on the right side, then rest again before the next round.
- Keep the lever, side order and actual seconds visible in the log. End the session's hold allocation when either support is no longer reliable, rather than adding time or a catch-up hold.
A shorter hold or knee-supported lever is a deliberate easier version. Increase time only within the stated interval; changing to the longer lever is a new comparison, not proof that thirty seconds and fifteen seconds are equivalent work.
Progress the Actual Prescription Without Forcing the Next Pair
For the normal two-set dynamic lifts, build controlled repetitions within the listed range. Consider the smallest suitable load increase only after both sets reach the upper target with the intended effort, range, handling and recovery. A set reached by swinging, shortening the movement or extending rest unnoticed does not meet that comparison. This plan does not require a second qualifying session as a separate rule, and the calendar does not demand an increase. Repeating a workable load remains sensible when readiness or the next available increment is uncertain. Qualifying a one-set introductory version is not evidence that the same load has already qualified two working sets. Keep A, B and C contexts visible when an exercise repeats. Compare A floor pressing with other A floor-press sessions; a different preceding exercise can change performance. An ordinary load increase remains in that exercise's history. A new grip, support, range or implementation is recorded as a changed comparison, not erased or claimed to be identical.
A larger increment can be too much
The following is a fictional record for Workout A's floor press, using the same pair shape, grip, floor endpoint, tempo, rest and roughly two to three good repetitions in reserve. Loads are per dumbbell in kilograms, not recommended starting weights. The exposures are successive A records, not promised calendar weeks.
| A exposure | Load per dumbbell in sets 1 / 2 (kg) | Reps in sets 1 / 2 | Total reps | Decision |
|---|---|---|---|---|
| 1 | 10 / 10 | 10 / 9 | 19 | Keep the load and build within the range. |
| 2 | 10 / 10 | 12 / 11 | 23 | The second set is below twelve; do not increase yet. |
| 3 | 10 / 10 | 12 / 12 | 24 | Repetition criterion met; check effort, handling and recovery before increasing. |
| 4 | 12 / 10 | 7 / 10 | 17 | The first working set misses eight; reduce the load for only the one remaining suitable set. |
| 5 | 11 / 11 | 8 / 8 | 16 | One possible later result with a suitable finer pair; retain it while rebuilding reps. |
The totals are 19, 23, 24, 17 and 16. Exposure 4 contains two working sets, not a failed test followed by two new sets. Stop altogether if symptoms or poor control make its remaining set inappropriate. Exposure 5 is conditional on a suitable finer pair and readiness; staying at 10 kg is also valid. Moving from 10 to 12 kg per dumbbell adds 2 kg, or 20%. Moving from 10 to 11 kg adds 1 kg, or 10%. These are mass comparisons, not safe-increase thresholds or predictions of muscle growth. Even the finer increase may be unsuitable. Use only secure manufacturer-permitted adjustments, never loose attachments.
When your available weights do not fit
If the first working set falls below the range at the intended effort, keep it recorded, settle the weights and choose a lighter appropriate load for at most the remaining set. If no suitable lighter load exists, omit the unresolved work rather than force repetitions or substitute an unfamiliar exercise. More rest can help recovery but does not repair an unsafe hold or floor entry. At the other end, reaching the upper target while many more good repetitions remain can mean the available weight is no longer challenging enough for this plan's intended effort. Do not shorten rest, swing, add arbitrary sets or stretch every set indefinitely to disguise that limit. Obtain a suitable load, retain what remains useful or deliberately choose another programme or adaptation with its own prescription. This page does not automatically replace a bilateral row with per-arm work or turn every goblet set into extra split squats.
Qualify both sides and respect non-repetition tasks
For the split squat's shared pair, both working sets on both lead legs must qualify before considering more weight. Do not let the easier side dictate an increase or add sets to the other side. This is the programme's shared-load rule, not a diagnosis of an imbalance. For dead bugs, qualify the repetitions on both sides within both alternating sets before considering a modest longer reach. For walkouts, build complete cycles through the same short journey before lengthening it slightly. For side planks, build both holds on both sides towards thirty seconds before considering a harder lever. Changes of reach or lever need a manageable new baseline; holds and cycles do not become kilograms or equivalent muscle sets.
Understand the Weekly Work Without Double-Counting Sides
The three normal sessions contain twenty exercise slots. A written set allocation counts each row's set once, while a separate work bout counts a split-squat side or side-plank side individually. An alternating dead-bug set stays one bout containing both sides. These are recording conventions, not a single measure of training stimulus.
| Session | Exercise slots | Normal written sets | Normal work bouts | Introductory written sets | Introductory work bouts |
|---|---|---|---|---|---|
| Workout A | 6 | 12 | 12 | 6 | 6 |
| Workout B | 7 | 14 | 18 | 7 | 9 |
| Workout C | 7 | 14 | 14 | 7 | 7 |
| Complete A/B/C cycle | 20 | 40 | 44 | 20 | 22 |
A gives 12 normal bouts, B gives 18 and C gives 14: 44 altogether. B has four split-squat bouts and four side-plank bouts because each side works separately. Its other five rows give ten bouts. The introductory version gives 6, 9 and 7 bouts, totalling 22. Each row has half as many sets, but that does not prove exactly half the fatigue or muscle stimulus.
Use each side and unit correctly
At ten repetitions in both split-squat sets, the left-leading side records 2 × 10 = 20 repetitions and the right-leading side another twenty. That is four bouts and forty lead-leg repetitions across both sides, not forty per leg. Both legs still contribute within each repetition. For two dead-bug sets at six repetitions per side, each set contains twelve alternating reach-and-return movements. Two sets give twelve left-leg reaches and twelve right-leg reaches, twenty-four total movements within two bouts. Do not convert that into four sets. For two twenty-second side-plank holds per side, each side has forty seconds and the combined record has eighty seconds across four holds. For two sets of six walkout cycles, the record is twelve complete out-and-back cycles, not twelve heel steps. Do not add seconds, cycles and lifting repetitions into a workload score.
Know what the plan emphasises
Across the normal cycle there are four floor-press sets, two overhead-press sets, six row sets, four goblet-squat sets, two split-squat sets per lead leg, four RDL sets, two walkout sets, four lateral-raise sets, two hammer-curl sets, four calf-raise sets, four alternating dead-bug sets and two side-plank holds per side. Repeated names are separate allocated appearances, not instructions to repeat their entire tutorial as extra work. Presses overlap in triceps and anterior-shoulder work; rows also involve elbow flexors and the rear shoulder. These exercise totals are not isolated weekly doses for every named muscle. The guide to counting workout sets explains that distinction. This modest general programme does not claim to maximise every muscle's growth or replace all the exercise choices of a fully equipped gym.
Handle Missed and Partial Sessions Without Starting Again
Keep the order A, B, C even when weekday names shift. After completing A on Monday and missing Wednesday, perform B on Friday when ready, then C on Monday after recovery, and A on Wednesday. Do not skip B, combine B and C or use consecutive days to force the original calendar back into place. One disrupted week does not require another programme. If only two days are consistently available, the existing missed-workout guide can help with the immediate scheduling decision, but three sessions spread over a longer cycle are not the same weekly exposure. Choose a complete schedule that fits that availability rather than continually deleting C.
A short set still counts
In a two-set row, no work completed leaves up to two suitable working sets. One completed or stopped working set leaves at most one; two completed sets leave none. A first set of five repetitions in an eight-to-twelve range is still one performed set. Doing it and then restarting two sets gives three bouts, not two. These caps apply to the same planned bilateral exercise. They do not prove that one bilateral set equals two side-specific sets or that another exercise supplies identical stimulus. The example does not authorise an unplanned replacement programme.
A partial session is a real session
Suppose A ends after both goblet sets, both floor-press sets and the first row set. Five working bouts have occurred; seven of the normal twelve remain unperformed. If the interruption is brief and continuing the same session is appropriate, only the unfinished work remains available after suitable preparation and rest. Do not restart the five completed bouts. If the session is over for the day, keep it marked partial and continue with B after recovery rather than carrying all seven bouts forward as a debt. Repeated interruptions call for the reduced allocation or a more suitable schedule. Symptoms, lost control or damaged equipment mean stopping, not completing arithmetic. A split-squat or side-plank set stopped on one side remains recorded on that side. Do not force the other side to match through symptoms or claim both sides were completed. Keep any genuine light rehearsal separate from demanding work.
Adjust Recovery and Stop When the Problem Is Not Training Fatigue
Review repeated performance, sleep, soreness that changes movement and the ability to handle the weights, rather than judging recovery from one difficult set. First check actual rest, equipment and unplanned exercise. Add a recovery day when needed; do not make every lift harder at the same time. If the normal allocation is no longer repeatable, use a temporary one-set-per-row A/B/C cycle with approximately three to four good repetitions in reserve on ordinary lifts and easier controlled trunk tasks. This is a reduced training choice, not treatment for pain. Restore the second sets only when manageable; there is no compulsory deload every fourth week or automatic return after seven days.
Separate symptoms from a progression problem
Stop and put the weights down as safely as possible for sharp or worsening pain, spreading symptoms, unusual weakness, dizziness or unreliable control. Recurring symptoms or difficulty with ordinary activities warrant suitable healthcare advice rather than a heavier test or a different grip used as a diagnosis. Seek urgent medical advice for sudden severe or rapidly worsening back pain, or for back pain with fever or feeling generally unwell. Sudden or very bad shoulder pain, inability to move the arm, marked swelling or a changed shape, persistent pins and needles, loss of feeling, or an unusually hot or cold arm also needs urgent assessment. Follow the appropriate local service rather than using this workout as rehabilitation. Seek emergency help for tight or squeezing chest pain, pain spreading from the chest to an arm, neck or jaw, severe breathing difficulty, or someone unresponsive. Back pain accompanied by new symptoms in both legs, loss of feeling around the genitals or anus, or bladder or bowel changes needs immediate assessment; so does back pain after a serious accident. These are examples, not an exhaustive checklist or permission to ignore other concerning symptoms. After illness or injury, individual advice and recovery take priority. This page cannot diagnose the cause or clear a return date. Do not apply the introductory cycle as if it were a clinical recovery prescription.
Keep a Useful Record and Support the Training
A notebook or ordinary notes are enough. Record the date and A, B or C; the exercise version; kilograms or pounds; mass per dumbbell for paired lifts and the single mass for goblet squats; each set's actual result; actual rest; and the effort or control limit. For split squats, name the front leg. For planks, name the supported side. For dead bugs, use the reaching leg to identify the side. Record ranges, side order and relevant changes in preceding work. A blank means unrecorded, not zero or successful completion. Keep earlier records when a new load is used; label a changed exercise or support rather than turning it into a personal best on the old movement. There is no required public log download or assumed tracker preset.
Meals, cardio and sleep remain part of the wider week
Use regular meals, sufficient food and protein for your goals, normal hydration and consistent sleep to support repeatable training. No supplement stack, fixed surplus or mandatory fat-loss target is part of this plan. The Nutrition Guide covers those broader decisions without turning this workout into a separate diet prescription. Keep walking or other cardio at an amount that fits recovery and your wider health goals. Do not add compulsory high-intensity intervals after every session or use extra exercise to repay a missed day. This is the resistance-training part of the week, not a complete individual health or endurance prescription.
Stay with a schedule that fits
Keep this plan while its movements, available weights and recovery support useful progress. There is no required graduation after eight weeks, no promise of a particular body change and no requirement to progress to more training days. The 5-Day Dumbbell Workout Plan is a separate option when five sessions genuinely fit. It has different allocations and equipment choices, not two extra days to append to this plan. The three-day programme is complete as written; another schedule is a choice, not a reward for finishing it.
3-Day Dumbbell Workout FAQs
Can I build muscle with dumbbells three days a week?
A suitable three-day programme can provide repeated resistance training, but results depend on exercise demand, effort, recovery and progression. This plan is not a guarantee of a particular result or a claim that its set count maximises growth for every muscle.
Do I need a bench?
No. All prescribed exercises use standing or floor positions. Floor pressing does not recreate a bench press's lower range, and the row has no chest support. Adding a bench later is a deliberate change to the programme, not a missing prerequisite.
Will one fixed dumbbell pair be enough?
Not necessarily. The same pair may be too heavy for lateral raises and too light for squats. Loads must fit handling as well as the repetition range. Do not improvise extra weight or assume more repetitions can solve every equipment limit.
Is this suitable for a complete beginner?
It includes a one-set introductory cycle, but a beginner still needs to learn the movements and their entry and exit. Use instruction when handling is uncertain. An easier load or bodyweight rehearsal is not permission to skip learning the setup.
How long should each session take?
It depends on your actual repetitions, per-side work, recovery and equipment changes. B includes separate split-squat and plank sides, so it has more bouts than its seven rows suggest. Do not shorten the listed rests to meet a promised thirty-minute finish.
Can I train on three consecutive days?
That is not this plan's schedule. Keep at least one full non-training day between the full-body sessions and add recovery when needed. Choose a different complete arrangement if your available days cannot support that spacing.
What should I do when I miss Wednesday?
Keep the session order. After Monday A, the next session is B, even if it happens on Friday. C follows after recovery. Do not combine both missed and planned sessions or permanently discard one to preserve weekday labels.
Do both legs get two split-squat sets?
Yes, in the normal allocation. Two sets with the left leg leading and two with the right create four separate bouts. Rest after each side. The introductory allocation uses one set per lead leg; both feet stay on the floor.
Do dead bugs also need separate sets for each side?
No. Alternate opposite arm-and-leg reaches inside the same set until each side has its target, then rest. Two sets of six per side contain twenty-four reach-and-return movements in two bouts, not four sets.
When do I increase the dumbbell weight?
For a normal two-set lift, both sets must reach the upper target with the intended effort, movement and secure handling before a suitable increase is considered. For the split squat, both lead-side records must qualify. A calendar week or a single better set is not enough.
Can I add pull-ups, extra arm work or finishers?
Not automatically. The plan already distributes pressing, rowing, direct arm and trunk work. Pull-ups require different equipment and a deliberately revised allocation; a missing vertical pull is disclosed rather than secretly filled by extra sets.
How many weeks should I follow the plan?
There is no fixed expiry or promised result week. Continue while the programme fits your goals, available resistance and recovery. Review a genuine limitation or repeated plateau rather than changing everything after one poor session.